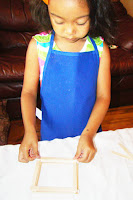
Are you ready for some more fun craft projects? It's been too long that I have worked on a fun craft project with my little one, so I decided to make some craft stick jewelry boxes. My little one loves jewelry. I am always catching her in my jewelry. She is always trying on all my necklaces, bracelets and rings, usually all at onetime. So I thought what can be better then making your own handmade jewelry box. Something that she will treasure and adore and it will be definitely be a keepsake.
Supplies:
Craft Sticks
Craft Glue
Paint
Paint Brushes
Apron
Sparkling Gems/Jewels
Newspaper/cloth
Wax-Paper
Gather all your supplies together, so you can easily reach for them. Place the apron on your little ones, so they won't mess up their beautiful attire. We first started off with the lid and the base of the jewelry box. Count out 12 craft sticks and place them side by side next to one another on your work table. Glue one craft stick across the top and glue the other stick across the bottom (like you are making a fence). This will hold the sticks securely in place. Make sure your repeat this process twice, since you will use one for the lid and the other one for the base. If you're working with little ones, make sure you show them how to do it first. I showed Sophia how to do it first and then she got the hang of it and was off working on her lid and base.
Second, place 2 craft sticks across from one another (one will be on the left and the other the right side) lay another set of 2 craft sticks across from the first 2 in the opposite direction. Reach for your craft glue and place a tiny bit of glue at the tip of the sticks where they touch at the corners. This will create a beautiful square. Keep alternating and repeating this process until you reach a desire height for your jewelry box. Sophia was so into placing the glue on the ends craft sticks, that I did not even realize how high she made her jewelry box.
Once all of your jewelry boxes are finished, place them aside to dry completely. Our jewelry boxes were completely dry and we were ready to decorate them. Without any hesitation, the little one reached for her paint brushes and started to paint her jewelry box. Now, it was time to set it aside once more to dry off.
We all wanted to make our jewelry boxes to look absolutely fabulous, so we gathered some sparkling gemstones and glued away. Place them on top of your lid and create your own design. You can use gemstones, glitter, stickers or anything else you may think would look good. Have fun with it and keep adding more gemstones. Sophia really liked this part of the process. It made her happy, which of course made me happy.
Sincerely,

Subscribe to keep up with our post!


24 thoughtful responses:
Cute Craft, I will have to try this one!
TAG You're it! From Jessica @ Jessica Loves to Save Money :-)
www.jessicalovestosavemoney.com
I'm late but happy to be here :) tag! You're it!!
I am following you back! These jewelry boxes remind me of a project I made as a child, so nice!
Love that project! Thanks for stopping by my blog!
What GREAT crafts!! I'm lucky follower 555!! :-D
I'm following back! Thanks for following me...can't wait to explore.
Hi! This is really cute! Thank you for visiting my blog and following me! I'm following you back now.
Paula@One Mom's Corner of the World
thanks for following me, following back.
LOVE this craft idea, very cute
http://bassgiraffe.blogspot.com
Thank you for your kind comments about my blog! When I read blogs like yours it makes me with I had a little girl that I could make sparkly jewelry boxes with! Have a lovely day!
xo Erin
Cute! You might like my other blog as well, mommypreschool.blogspot
Thanks for stopping by Lemons to Lemonade and becoming a follower. I am now following you as well.
Very cute craft idea and I love your helpers!
Following you back! Thanks for visiting us.
ooops... i'm following as Lilli not as Traveling with Kids
Love your blog! I am always looking for new things to do with my kids! Thanks for following!
http://www.pbandjoy.com/
These are so cute! Thanks for the follow. I'm an existing follower of yours!
I am now following you from the Mom Bloggers Club
Why don't you stop on by my blog too ;)
http://www.supersavvymommy.com
Oh this is too cute! I've seen this done before but not with the glass jewels and with the boxes painted. You can really turn this into a true keepsake. Good share, thanks!
Haupi
I'm following you back from Welcome Wednesday! Am excited to follow your blog!
Sandy
http://theseppifamily.blogspot.com
Good Morning, thanks for visiting!! I am your newest follower, hope you have a great day!
Smiles,
Nicole
Thetwosavvysisters.blogspot.com
I gave you the Trendy Blog award. Check out my post to recieve it.
http://pinkelephants2.blogspot.com/2010/06/my-first-blog-award.html
- Nicole
What a fun craft project! I remember making these at school, although they did not look as good as the ones you have featured in this post.
Thanks for coming by Mama Views, following you now too!! Happy Friday =)
And great craft too, I look forward to crafting with my girls this summer =)
Thanks for stopping by my blog. I am now following you too! :)
Stop by again anytime.
Blessings!
LaVonne
www.longwaitforisabella.blogspot.com
Oh wow, my daughter would love this craft. She would craft all day if I let her and would probably make enough to give to all her friends! We'll definitely try this out. Thanks for stopping by, hope you like the twingles if you try them!
Post a Comment